My role in our team was to texture the models made by other members.
With those UV's I could put that into photoshop to paint or texture.
The texture map then can be put into a material on maya and applied onto the object.
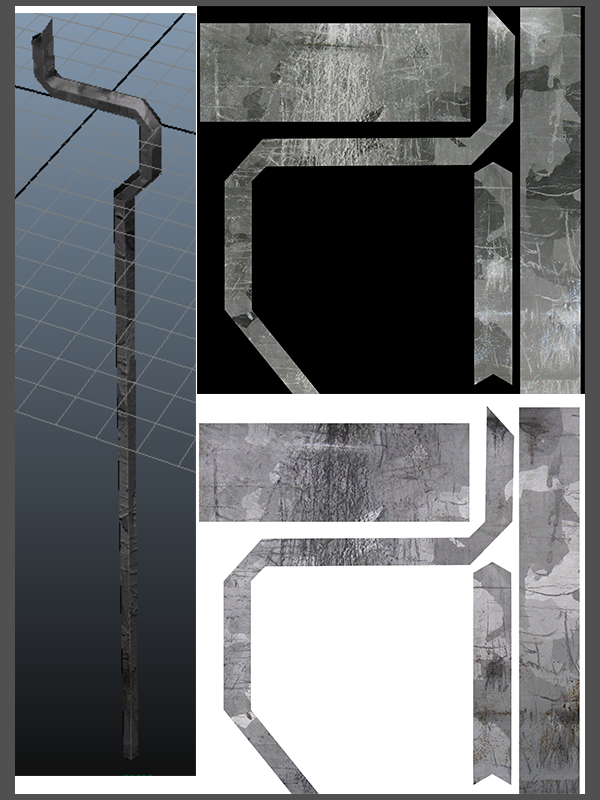
The final product looks like this; the model combined with that texture made in Photoshop using UV's from Maya.
This process is fairly repetitive and sometimes tricky as the UV's may not be optimal, an example being a rectangle face with a square UV shell, the texture would be stretched out. I ran into this problem a few times but most of the time it was just a case of tweaking the UV's slightly in order to fix the texture.
In addition to the texture map I made, after finishing it, I made the image black and white and inverted it. This was to make a bump map to support the texture.
When it's gray-scale and a crack for example would appear black, when inverted white. The map reads white as a 'bump' for the texture so it adds much more depth to the finished asset. This is an example of the cube with and without the bump map.
Below is the rest of the textures, bump maps and final products that I produced for our group.
My role in the group was very repetitive and got quite boring at times but it was a necessary part of the production of the game. If I had more time on this project, I'd devote more time into the actual textures, to make the game look as good as possible. Unfortunately I felt there were too many to put a lot of effort in with the time I had. Even so, I thought I did well on my part of texturing. I would have liked to have spent more time tweaking the UV's, sometimes it was problematic. For example I had to hold back on the detail I could put on because many of the shells were identical and therefore stacked onto eachother on the UV map. This saves a lot of time when it comes to texturing but any individual details would be repeated many times and look out of place.
Overall, I learnt a much more about UV shells and the general process of unwrapping and texturing. Before I started this project it was probably my weakest point when it came to producing a game ready asset start to finish. I learnt small things like changing the shapes of UV shells slightly to enhance the texturing process and got very accustomed to the things I do know. Things like materials and applying them, with different maps and options.


.png)


